Proxmox 9 Deployment: The Erasing and Rebirth of N100
📖 Meet the Cyber Foundation: Proxmox VE (PVE)
Section titled “📖 Meet the Cyber Foundation: Proxmox VE (PVE)”Before we commit “homicide” on the hardware, let’s meet our protagonist.
Proxmox Virtual Environment is an open-source server virtualization management solution based on QEMU/KVM and LXC. You can easily manage virtual machines, containers, high-availability clusters, storage, and networks through an extremely easy-to-use Web interface or CLI. The project is open-source under the GNU AGPLv3 license and is developed and maintained by Proxmox Server Solutions GmbH. —— Excerpt from official documentation
In our Homelab circle, we affectionately call it PVE.
Compared to VMware ESXi, which is extremely picky about hardware and charges at every turn, PVE is a “Cyber Bodhisattva.” It’s not only completely free and open-source, but also extremely tolerant of hardware—whether it’s an enterprise Dell workstation or our 12GB RAM AOC MOSS N100, it will take root stably and squeeze out every drop of hardware performance.
You can install Proxmox VE (PVE) directly on physical hardware using a standard ISO image. This is the absolute foundation for building a cyber studio.
🧱 Pre-construction Requirements
Section titled “🧱 Pre-construction Requirements”Before ruthless execution on the N100, ensure you have the following “crime tools” at hand:
- The Victim: An AOC MOSS N100 with 12GB RAM (or your own machine).
- The Tool: A USB drive of at least 8GB.
- Command Center: A Mac or Win machine (for downloading images and flashing the boot drive).
- Network Conditions: An ethernet cable plugged into the N100, ensuring the network assigned by the main router is functional.
- VPN/Proxy Environment: To avoid various strange network issues.
- Version Note: This tutorial applies to
proxmox-ve_9.1-1.
📜 Official Blueprints
Section titled “📜 Official Blueprints”When encountering metaphysical problems, checking the official manual is always the safest choice:
🎬 Construction Walk-through Video
Section titled “🎬 Construction Walk-through Video”If you fear BIOS booting and black-and-white installation interfaces, click this video to build some psychological resilience.
🔨 Core Installation Steps
Section titled “🔨 Core Installation Steps”-
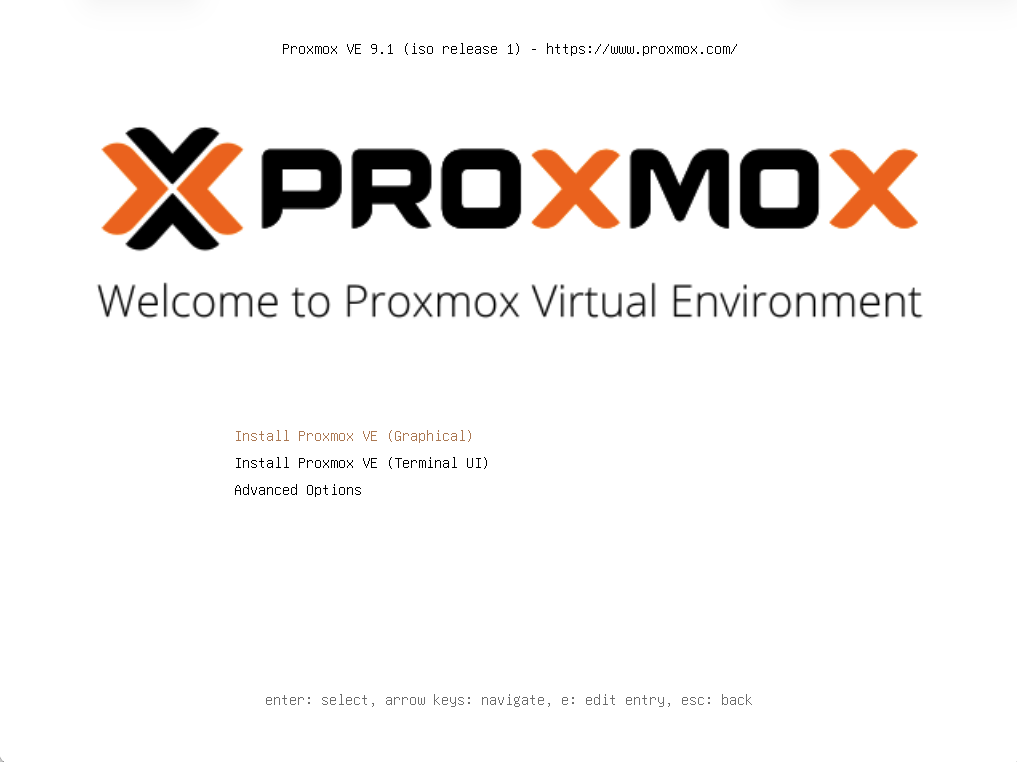
Acquire the “Blueprint” (Download Image)
Go to the PVE official website to download the latest ISO image. This file, less than 2GB, is the absolute foundation that will support our entire cyber studio.
-
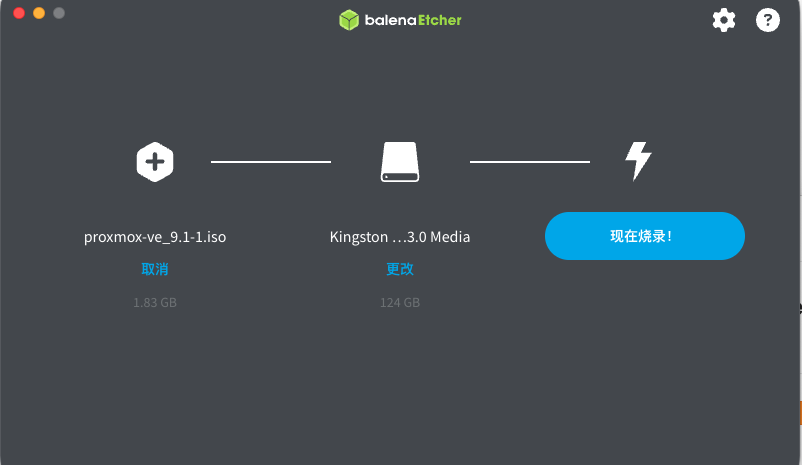
Forge the “Takeover” USB (Flash Image)
Prepare your 8GB USB drive. On a Mac or Windows machine, use a flashing tool to inject the ISO soul into the USB drive.
- 🍎 For Mac Users: BalenaEtcher (Great UI, brainless 3-step flashing)
- 🪟 For Win Users: Rufus (The classic, lightweight, and hardcore tool)
-
BIOS Takeover and Low-level Tuning (Critical)
Plug the flashed USB into the N100, power it on, and the moment the screen lights up, frantically tap
Del(orF2on some machines) to force your way into the physical brain (BIOS).To let PVE completely take over the hardware, find and modify these four core parameters:
- 🔓 Disarm Defense (Secure Boot)
In the
Securitytab, findSecure Bootand set it ruthlessly toDisabled. This Microsoft lock is the culprit preventing Linux from taking over; it must be smashed. - 🧬 Unlock Genes (VT-x / VT-d)
In
AdvancedorCPU Configuration, findIntel Virtualization TechnologyandVT-d. Set both toEnabled. This is the physical basis for running VMs. - ⚡ Auto-Power On (AC Recovery)
In
PowerorChipset, findRestore AC Power LossorState After G3and set it toPower On. As a qualified cyber studio, it must start working the moment power is restored. - 🚀 Forced Usurpation (Boot Order)
In the
Boottab, setBoot Option #1to your USB drive (usually labeledUEFI: Your USB Brand).
After saving with
F10, you’ll be greeted by PVE’s sexy black installation interface instead of the Windows logo. - 🔓 Disarm Defense (Secure Boot)
In the
-
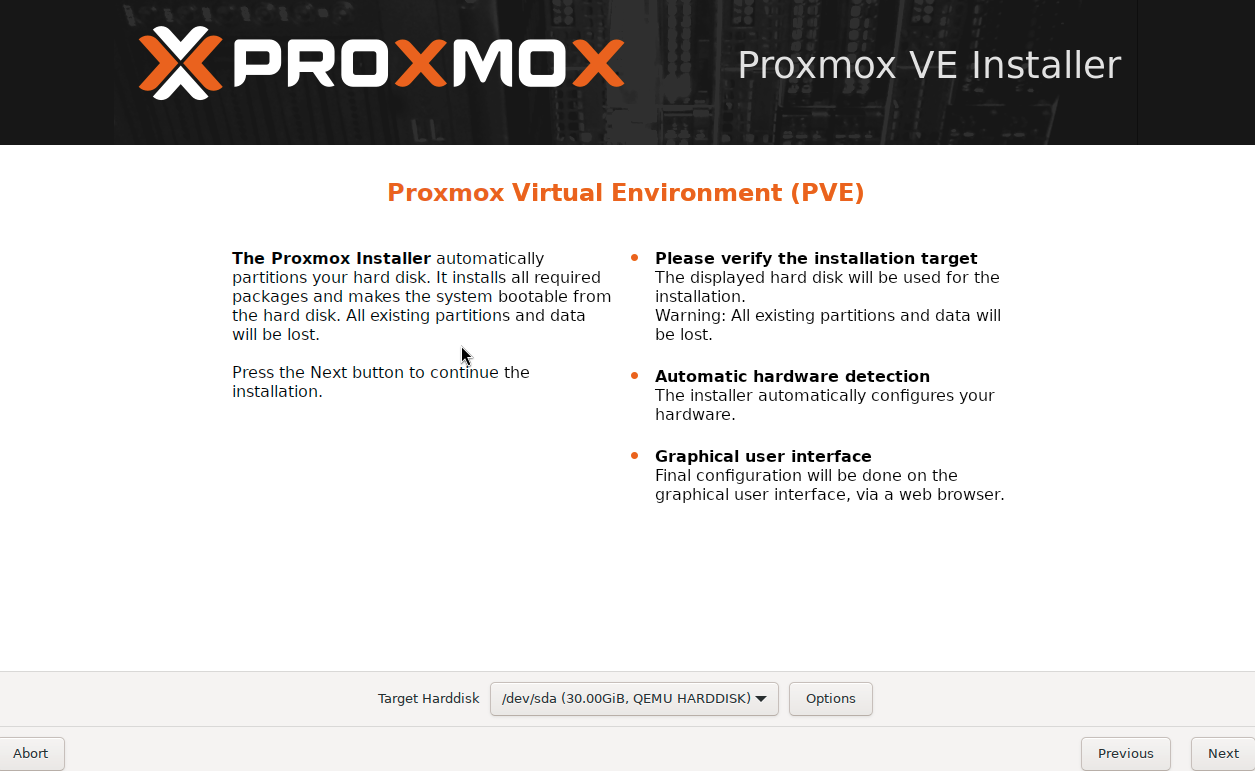
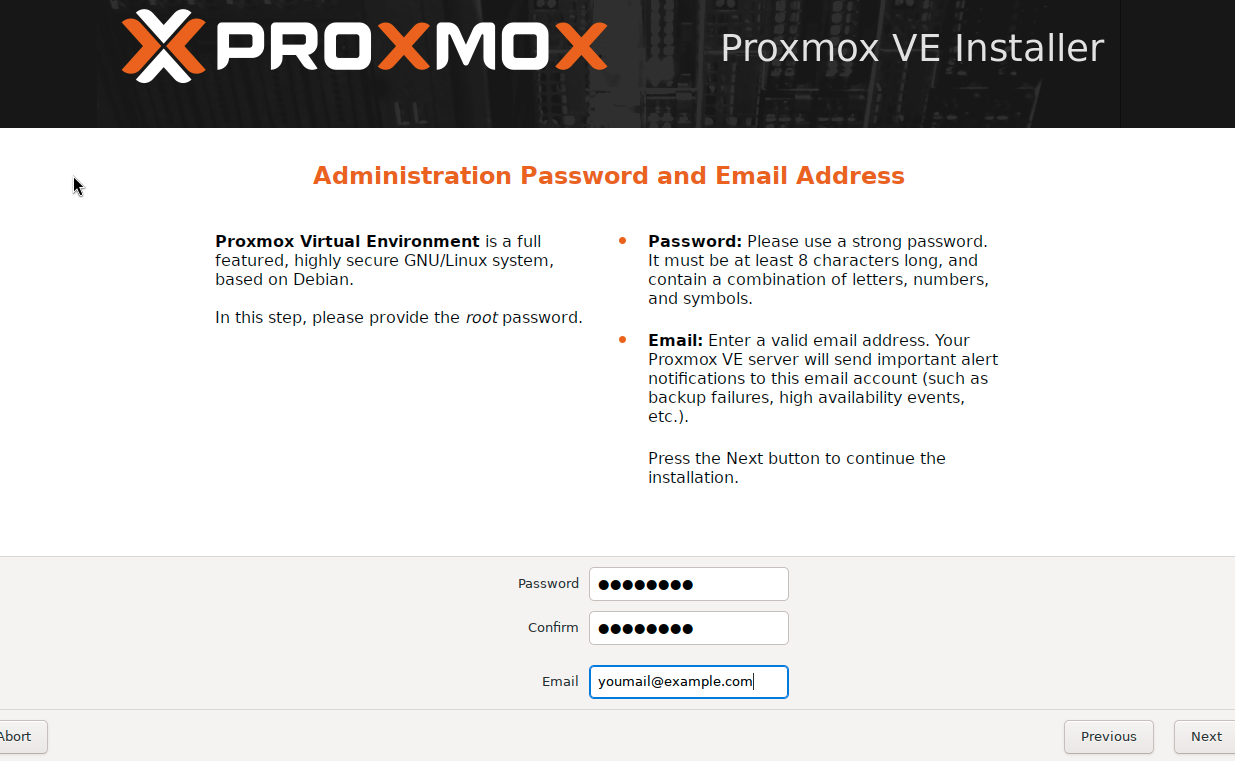
Basic Identity Entry (System & Auth)
After the code scrolls, enter the PVE Graphical Installer. Agree to the terms and fill in the following:
- Target Harddisk: Select the built-in 256GB SSD. (Foreman’s advice: Don’t touch ZFS with 12GB RAM; stick to
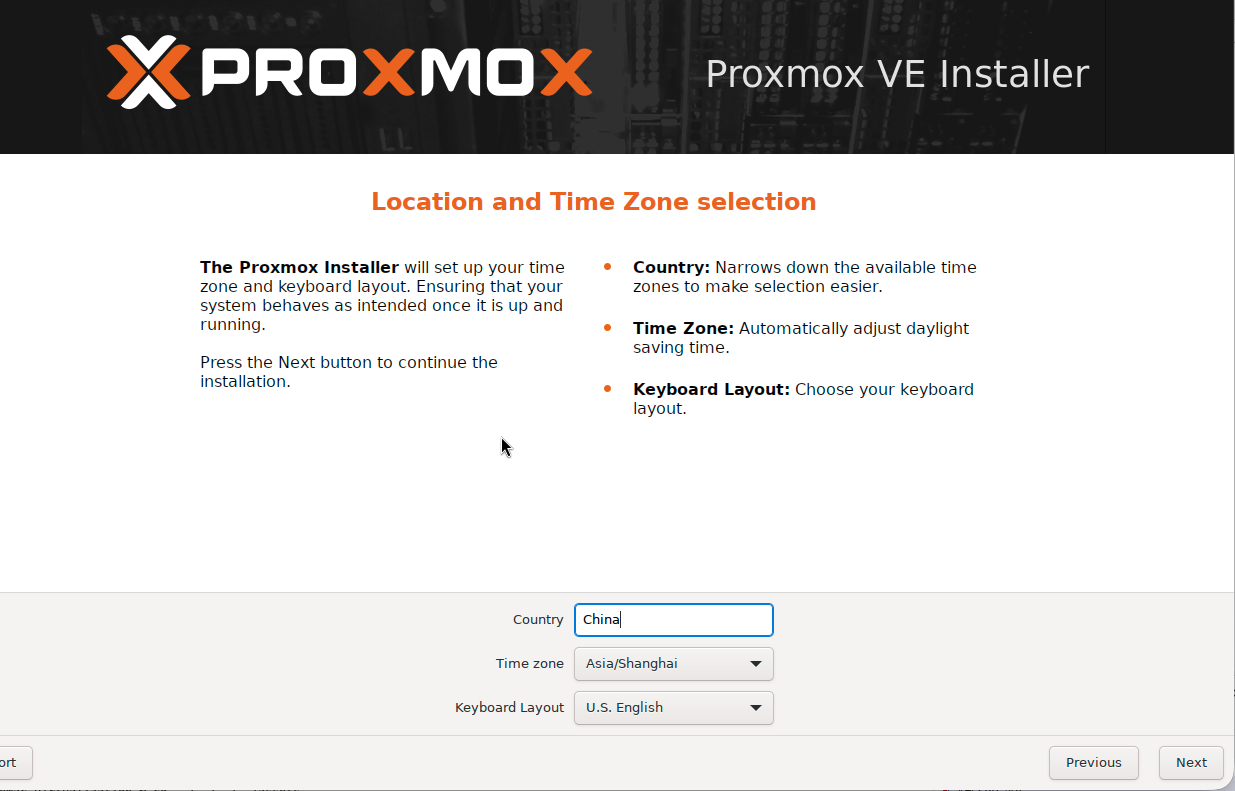
ext4orxfs). - Country/Timezone: Enter
China, timezone locks toAsia/Shanghai. - Password: Set your
rootsuper password. Write it down immediately! Resetting a forgotten PVE password is anti-human. - Email: Enter your actual email for notifications.
- Target Harddisk: Select the built-in 256GB SSD. (Foreman’s advice: Don’t touch ZFS with 12GB RAM; stick to
-
Network Addressing Configuration
This is the step most likely to cause “disconnection.” Remember: The tutorial is static, but your environment is alive.
- Management Interface: The N100 has two ports. Foreman’s Strong Suggestion: Only plug in one ethernet cable connected to the main router during installation! The active port will show as Green (Active) in the dropdown. Choose the green one (usually
enp1s0oreth0).
Parameters for reference:
# Cyber Foundation Network Config (Adjust to your segment!)Hostname: pve-studio.homelab.localIP Address: 192.168.100.50/24 # 👈 This is MY IP! Use your own!Gateway: 192.168.100.1 # Points to your main routerDNS Server: 192.168.100.1 # Usually matches the gateway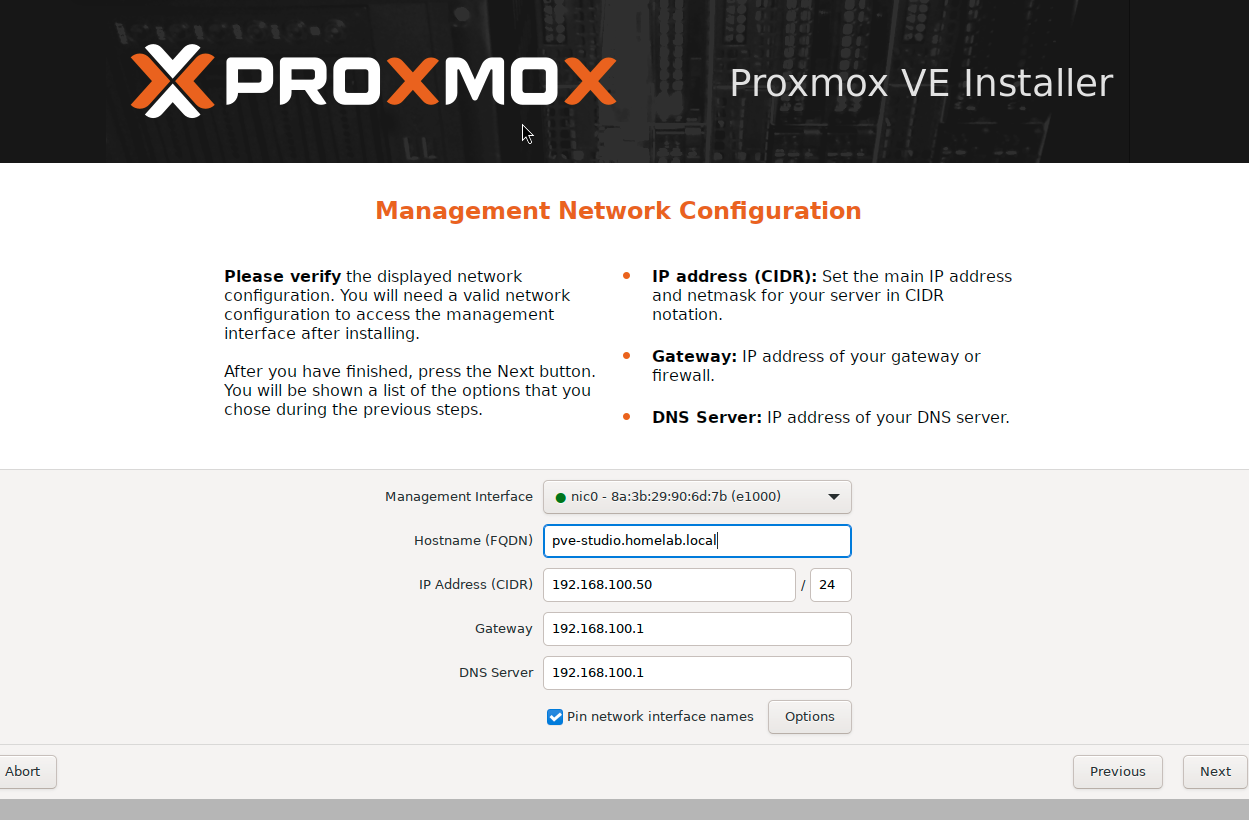
- Management Interface: The N100 has two ports. Foreman’s Strong Suggestion: Only plug in one ethernet cable connected to the main router during installation! The active port will show as Green (Active) in the dropdown. Choose the green one (usually
-
Unplug and Takeover (Reboot & Takeover)
After confirming, click Install.
- Once
Installation successfulappears, click Reboot. - The moment the screen goes black, pull out the USB drive!
- Windows 11 is now dead; PVE officially takes over the N100. The screen will stop at a black-and-white login prompt with a URL.
- Once
🚪 Post-Installation Access
Section titled “🚪 Post-Installation Access”Go back to your Mac Mini, open a browser, and enter:
https://192.168.100.50:8006 (Use the IP you actually set!)
🛠️ Advanced Construction: Day 1 Optimization
Section titled “🛠️ Advanced Construction: Day 1 Optimization”After logging in, the first task isn’t creating VMs, but “finishing” the system. Select the pve-studio node on the left and click >_ Shell on the top right.
0. Prepare Your Tools (SSH Connection)
Section titled “0. Prepare Your Tools (SSH Connection)”The web-based Shell can be glitchy with copy-pasting. The Foreman suggests using a professional SSH tool from your command center to connect to root@192.168.100.50.
- 🍎 For Mac: Terminal, iTerm2, FinalShell, or Termius.
- 🪟 For Win: Windows Terminal, MobaXterm, or Xshell.
1. Remove the “No Valid Subscription” Popup
Section titled “1. Remove the “No Valid Subscription” Popup”sed -i.bak '/.*data\.status.*active/{s/!//;s/active/NoMoreNagging/}' /usr/share/javascript/proxmox-widget-toolkit/proxmoxlib.js && systemctl restart pveproxy.service2. Backup Debian Sources
Section titled “2. Backup Debian Sources”cp /etc/apt/sources.list.d/debian.sources /etc/apt/sources.list.d/debian.sources.bak3. Replace with Tsinghua Mirror (Mainland China Only)
Section titled “3. Replace with Tsinghua Mirror (Mainland China Only)”cat > /etc/apt/sources.list.d/debian.sources << 'EOF'Types: debURIs: [https://mirrors.tuna.tsinghua.edu.cn/debian/](https://mirrors.tuna.tsinghua.edu.cn/debian/)Suites: trixie trixie-updates trixie-backportsComponents: main contrib non-free non-free-firmwareSigned-By: /usr/share/keyrings/debian-archive-keyring.gpg
Types: debURIs: [https://security.debian.org/debian-security/](https://security.debian.org/debian-security/)Suites: trixie-securityComponents: main contrib non-free non-free-firmwareSigned-By: /usr/share/keyrings/debian-archive-keyring.gpgEOFDisable Enterprise Repo
nano /etc/apt/sources.list.d/pve-enterprise.sourcesAdd No-Subscription Repo (Tsinghua Mirror)
cat > /etc/apt/sources.list.d/pve-no-subscription.sources << 'EOF'Types: debURIs: [https://mirrors.tuna.tsinghua.edu.cn/proxmox/debian/pve](https://mirrors.tuna.tsinghua.edu.cn/proxmox/debian/pve)Suites: trixieComponents: pve-no-subscriptionSigned-By: /usr/share/keyrings/proxmox-archive-keyring.gpgEOF4. System Update
Section titled “4. System Update”apt update && apt dist-upgrade -y5. Enable IOMMU Passthrough
Section titled “5. Enable IOMMU Passthrough”sed -i 's/GRUB_CMDLINE_LINUX_DEFAULT="quiet"/GRUB_CMDLINE_LINUX_DEFAULT="quiet intel_iommu=on iommu=pt pcie_port_pm=off"/' /etc/default/grubupdate-grub6. Reboot
Section titled “6. Reboot”reboot7. Validation
Section titled “7. Validation”Check if IOMMU is active after reboot:
dmesg | grep -e DMAR -e IOMMUIf you see IOMMU enabled, congratulations! Your N100 is in peak condition.
📂 Project Archiving
Section titled “📂 Project Archiving”Record your core parameters in your knowledge base.
## 🚀 PVE Core Asset Memo- **Management IP**: 192.168.100.50 # 👈 Your actual IP- **Gateway**: 192.168.100.1 # 👈 Your actual Gateway- **Hardware**: AOC MOSS M3L (N100 / 12G RAM / 256G SSD)- **Tuning**: IOMMU enabled, pcie_port_pm=off, Tsinghua mirror applied.🔗 The Cyber Foreman’s Secret Bookmarks
Section titled “🔗 The Cyber Foreman’s Secret Bookmarks”How can you tinker with PVE without standing on the shoulders of giants? Here are a few wild artifacts and communities that will save you a few strands of hair. When the official documentation can’t solve your metaphysical problems, come here for answers.
- 🪄 Proxmox VE Helper-Scripts (One-Click Magic)
- Foreman’s Note: An incredibly awesome community-driven script library. Browse, install, and manage containers (LXC) and VMs with a single command. This is the ultimate cheat code for our “day shift” construction, significantly reducing the pain of typing commands until your hands cramp.
- 🌍 Reddit r/Proxmox (Global Server Crash Symposium)
- Foreman’s Note: The gathering place for PVE players worldwide. Whenever you encounter some outrageous metaphysical bug that you can’t find on Google, search here. There’s a high probability you’ll find that some veteran stepped into the exact same pit three years ago.
👷♂️ The Cyber Foreman’s Hotline
If you’ve scoured the godly sites above, and even AI starts hallucinating from your endless questions, yet your cyber-mystery remains unsolved… don’t panic. You can always hail me through the comms channels in the Cyber Wasteland Guide.
Even though this Foreman is essentially a “cyber-noob” who relies on metaphysical troubleshooting, and I probably can’t offer any enterprise-grade solutions. But hey… what if our machines blew up in the exact same pit? It never hurts to discuss the fancy ways our servers died and give it a try!
➡️ Next Steps
Section titled “➡️ Next Steps”- Ultimate Dark Magic: N100 GPU SR-IOV Virtualization: Split one GPU into 7.
- Configure OPNsense: Set up the lab gatekeeper.
- Deploy First Blog Test Node: Start your acting career.